LOCAL IBM i development setup
There are a few hurdles to overcome to achieve local rpgle / clle development. This blog post will help you though those hurdles. The outcome is that changes you make on your local PC pushed to an IFS directory and compiled, while also being synchronized with online source/version control, such as Github, Bitbucket, Gitlab, etc.
To being, we will not be working on the IBM i. Instead, we will focus on getting your local PC able to talk to a remote repository such as GITLAB or GITHUB. Windows steps are pictured, but the process isn’t any different on a Mac.
VSCODE and Git setup
Install VSCODE
Go to the [Visual Studio Code download page] and install it on your machine. Once installed, it will notify you when there are updates and prompt you to update it, quite seamlessly. It usually only takes a few seconds.
Install GIT (local)
VSCODE automatically prompts you to download and install it the first time you click on the the source control view in the activity bar. After GIT install and reload of VSCODE, you should see the Open Folder and Clone Repository buttons in the source control view.

Configure Git
The first time you use Git, you must configure some settings. Open up a bash terminal in VSCODE and run the following 2 commands:
git config --global user.name "xx xxxx"
git config --global user.email "xx.xxxx@mail.com"

These settings will be used to identify you on every commit you make.
Set up SSH keys in Gitlab
We need to generate an SSH key pair on your local PC, then enter the public key in your gitlab profile. This allows easy, secure ability to push and pull content from your PC to Gitlab. All of the following instructions are pretty much the same if you use another SCM like Github instead of Gitlab.
-
Open up a bash prompt on your PC. If you are in windows, you installed gitbash when you installed git. You can install a linux distro like Ubuntu in WSL. Gitbash is simpler, but I recommend using WSL if you are interested in using development containers with docker.
-
run
ssh-keygen, taking the default by pressing enter on each prompt. Just press enter for the passphrase - you don’t need one. Once you see the randomart image for the key, a key pair was generated in your home directory. -
Copy the contents of your id_rsa.pub file. This is your public key that we will register in gitlab or gitlab. You can display its contents with
cat ~/.ssh/id_rsa.pub. Copy the entire contents, starting with ssh-rsa, ending after the last character displayed. -
Go into your Gitlab or Github account and register your publish ssh key.
After public key registration, you will now be able to securley access the remote repository (gitlab / github) using Git over SSH.
Install VSCODE extensions
There are a multitude of extensions available for VSCODE. They are available to install in the Visual Studio Code Marketplace, or you can access the same marketplace from within the VSCODE in the extensions sidebar view:
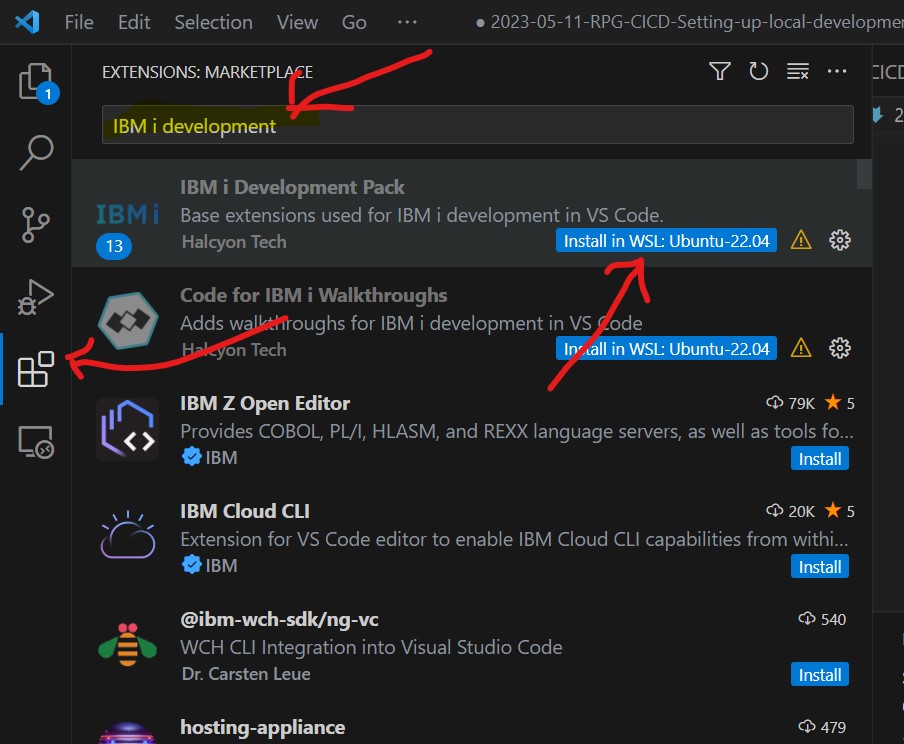
Here are the essential ones for IBM i development.
-
IBM i Development Pack This will install 13 extesions, all helpfull for developming on IBM i, including the Code for IBM i extension.
-
GitLense This gives you full visibility to your git repository, both locally and remote.
-
Log in to your IBM i with the Code for IBM i extension.
Create a project
There are two approaches to getting a project to sync to online source control. The easiest approach is to create a blank project online, then clone it locally. In this tutorial, we will use gitlab, but the same concept applies if you are using Github, Bitbucket, and the like.
- In the web browswer of your choice, log into your Gitlab account and create a new project. Think of a good name for your project. This will end up being the directory name where the source is stored. For this tutorial we will call it “My First IBM i Project”.
- Copy the project SSH clone URL and clone it
Clone it
- Set your deploy IFS target directory - do this in the IFS
In the next series of steps, we will work on the IBM i development partition where source will be built.
You need a home directory
You need to have a home directory on your development IBM i partition. It doesn’t matter how you add it, there are several ways. If we assume you can’t SSH, you can always do it with a CRTDIR command in the greenscreen.

Set default shell to Bash
If you haven’t done it yet, follow instructions in this link to set Bash as your default shell. For historical reasons, IBM i has ksh (kornshell) as the default shell. Most folks prefer Bash. Most open source examples you find on the web use Bash. The absolute easiest way to do it is to run the following command in ACS Run SQL Scripts tool:
CALL QSYS2.SET_PASE_SHELL_INFO('*CURRENT', '/QOpenSys/pkgs/bin/bash')
Setting up your IBM i profile
The first work we need to do is to set up your IBM i profile for open source development
- Setting your path
- etc. (WIP)
Git your code in shape
- WIP
More Setting up VSCODE
- WIP
Compiling code from a local repo
- WIP